5 Steps To Teach Easy Twist (Parivrtta Sukhasana) & Free Downloadable Yoga Class Handout
Hi, my name is George Watts. I’m a BWY yoga teacher with a hankering for handouts. I absolutely love creating handouts for my yoga students.
I hope the Easy Twist Pose Handout becomes a useful addition to your yoga teacher toolbag.
Step 1
Download The Yoga Class Handout
Easy Twist Handout | MS Word, PDF & ODT formats
This is just 1 of 250+ yoga class handouts included as a bonus within the online Yoga Genie Lesson Planner. With this epic bonus, you’ll be able to download an MS Word Document with 450+ pages of yoga class handouts.
It’s taken me years to create this document. They include all the “yoga class handouts” that I’ve created for my own yoga classes over the years.
And the best part is that you’ll be able to edit every single one of the handouts. For example, you might want to put your logo on the handouts or edit the descriptions a bit to add your own style. Your students will love receiving them.
Step 2
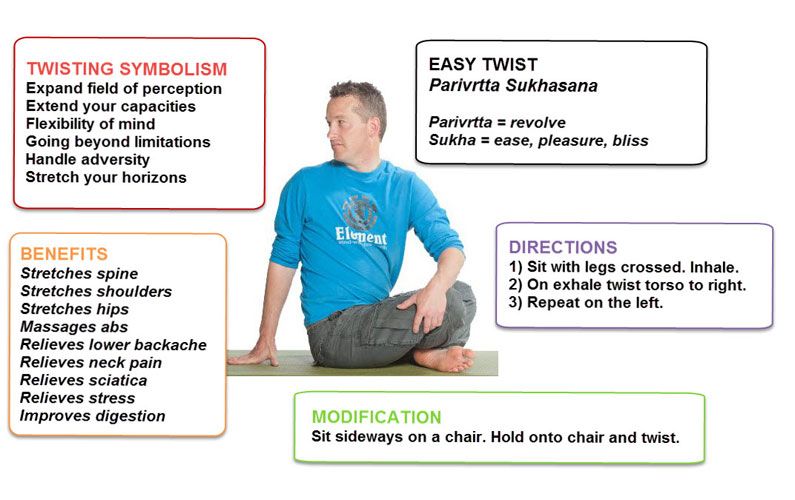
Teach Twisting Symbolism
Here are a few ways to teach Easy Twist pose with a Poet’s heart:
“Easy pose helps expand our field of our perception. When you need your perception to cast its net wider, practice Easy pose.”
“Easy pose teaches us to go beyond our self imposed mental limitations.”
“Practice easy pose to become great at handling adversity in your life.”
“What part of your life right now could do with a bit more flexibility? Where are you being too rigid in your mind?”
“If you want to stretch your horizons, practice Easy pose.”
“In easy pose we twist ourselves to extend our capacities physically, spiritually and mentally.”
“As you twist in each direction, you just might catch a glimpse at who you really are. The real you may emerge from round the corner?”
Step 3
Teach The Benefits
You could teach the benefits by rattling them off in list form like this:
- Improves digestion.
- Massages abs
- Relieves lower backache, neck pain, sciatica
- Relieve stress
- Stretches spine, shoulders, hips
But that’s going to bore the yoga socks of your students!
You could, instead, say something like this about Easy Twist pose to make the benefits come alive to your students:
“Alrighty, yogi friends! Today, we’re gonna talk about the many benefits of the Easy Twist pose – and trust me, they’re gonna make you wanna twist and shout.
Easy Twist pose helps to get your spine moving and grooving – which is important if you’ve been sitting at a desk or binge-watching The Mandalorian on Netflix for hours on end. So get ready to loosen up that back.
Next, the Easy Twist pose can help relieve tension in your hips and lower back – which, let’s be real, is probably where you’re carrying all your stress and worries. Twist it out and say goodbye to those pesky tight spots.
But wait, there’s more! Easy Twist pose can also help stimulate your digestive system, making it easier for your body to process all that delicious Yogic food you’ve been eating. When your tummy is a happy camper, so will you!
Last but not least, the Easy Twist pose can also help improve your focus and concentration – which is good news if you’re prone to mind-wandering.
So there you have it, the many benefits of the Easy Twist pose. Now let’s get twisty and enjoy practising the pose.”
Step 4
Teach The Pose
Here are the steps to teach Easy Twist pose with visualisation:
- Roots: Sit comfortably with your legs crossed. Imagine roots growing down from your sit bones into the earth, grounding you and helping you feel stable and secure.
- Spinal Energy: As you inhale, imagine a bright light shining up through your spine, lengthening and giving you lots of lovely energy. On your exhale, twist your torso to the right, feeling your spine gently unwind and your shoulders relax.
- Breath and Visualization: With each inhale, visualize your spine getting longer and taller. With each exhale, imagine your twist deepening and any tension melting away.
- Mindful Presence: Hold the pose for a few breaths, imagining yourself growing stronger and more balanced with each breath.
- Repeat: Repeat the pose on the other side, twisting to the left and using your breath to guide you deeper into the pose.
- Prop Support: If you need support, place a soft cushion or blanket supporting your hips or spine.
- Breath Awareness: Use your breath to anchor you in the present moment and help you find a sense of stillness.
- Release: When you’re ready to release the pose, gently unwind your spine and return to the starting position.
- Reflection: Take a moment to reflect on how the pose made you feel, and imagine yourself carrying that sense of groundedness and balance with you throughout the rest of your day.
Step 5
Teach The Modifications
If your students are feeling a bit tight, fear not because here are some modifications for the Easy Twist pose that will have them feeling fabulous in no time.
- Chair Twist: If your student feels a little wobbly or their hips aren’t feeling too flexible, that’s not a problem. Just ask them to sit in a chair and twist their torso to the right while holding onto the back of the chair.
- Supine Twist: If a student feels like he or she wants to take it easy and relax, get them lying on their back with their knees bent and twisting their torso to the right while keeping their shoulders on the ground.
- Supported Twist: For students who need a little extra support, ask them to grab their block or blanket and sit on it to raise their hips off the ground.
- Gentle Twist: If a student is feeling a bit sensitive or just wants to take it slow, ask them to sit comfortably with their legs crossed and twist their torso to the right while placing their left hand on their right knee and their right hand behind. And, of course, remind them to breathe deeply and smile.
- Seated Twist with Bind: Do you have an adventurous student? Ask them to try bending their right knee and placing their foot outside their left thigh, then twisting their torso to the right while reaching their left arm behind their back and clasping their right hand.
Here are a few variations of the Easy pose that you could get your students to practice while they are sitting with their legs crossed:

Easy Seated Pose Variation

Easy Seated Pose Variation

Easy Seated Pose Variation

Easy Seated Pose Variation

Easy Seated Pose Variation
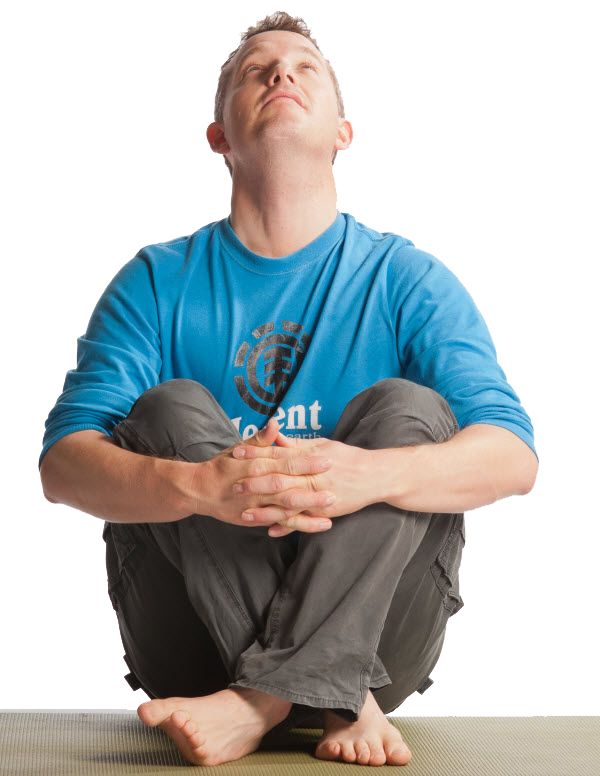
Easy Seated Pose Variation

