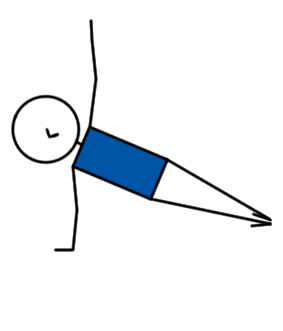
Side Plank Pose
[br]
Also Known As:
Category: Seated & Floor
Level: Advanced
Benefits: Abdominal strength. Shoulder stabilisation.
Precautions: Shoulder or neck tightness.
Teaching Steps:
A) Start in plank position (top of a push-up).
B) Extend body.
C) Step feet together.
D) Press weight down through right hand and forearm.
E) Roll body to the right, balancing on the outer edge of the right foot.
F) Stack the left foot on top of the right foot. Keep legs straight.
G) Extend left arm to the sky.
H) Reach through your fingertips as you lift your hips.
I) Press through heels into the floor.
J) Bring your body into one straight line.
K) Gaze at the top thumb.
L) Press down through your bottom index finger.
M) Hold.
N) Repeat on the other side.
Quick Teaching Tips:
Tip 1: Head
Keep your head in line with your spine.
Tip 2: Mirror
A mirror is helpful. It's very easy for gravity to take over and to fall into cervical lateral flexion which you want to avoid.
Tip 3: Rib-Hip Connection
Maintain your rib-hip connection or keep the imaginary springs between your ribs and hips on even tension. This cue is important especially as the upper-most arm becomes involved - there is a tendency for spinal extension - the idea is to maintain good abdominal activation throughout and a neutral spine.
Beginner Modification
Baby Side Plank: Don't raise your legs off the mat.
Chair Side Bend: Side bend on a chair.
Easy Side Bend: Easy side bend pose.
Half Butterfly Side bend: Half butterfly side bend pose
Standing Side Bend: Standing side bend pose.
Plank: Plank pose
Plank On Forearms: Plank On Forearms
Advanced Modification
Leg Raise: When you're in Side Plank, raise the top leg towards the ceiling.
Side Bend Using A Band: Side bend using a band.

