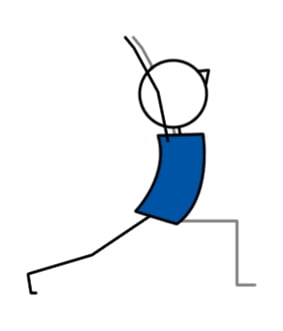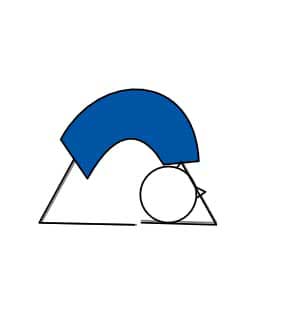
Pigeon Kneeling Backbend
| Sanskrit Name: | Kapotasana |
|---|---|
| Similar Pose Names: | Raja Kapotasana,Pigeon,Kneeling Backbend,Kneeling back bend |
| Category: | Seated & Floor |
| Share on: |
 Yoga Lesson Planner
 Pilates Lesson Planner
| Category: | Yoga Lesson Planner |
|---|---|
| Sub Category: | Seated & Floor |
| Types: | Arm Balance, Back Bend, Balance, Chest Opener, Hip Opener, Inversion, Object, Seated & Floor, Strengthen, Stretch |
| Anatomy: | Arms & Shoulders, Biceps & Triceps, Core, Hamstrings, Hips, Lower Back, Middle Back, Neck, Psoas, Upper Back, Wrists & Arms |
| Chakras: | Crown Centre, Heart Centre, Solar Plexus Centre, Third Eye, Throat Centre |
| Therapy: | Back Pain, Headaches, Leg Congestion, Poor Posture, Varicose Veins |
| Drishti: | Up |
| Dosha: | Pitta, Vata |
Begin kneeling, hands on hips, inhale and arch back, reaching hands toward feet. Place palms on soles, fingers pointing towards toes, elbows pointing up. Press hips forward, deepen backbend, and relax head back. Breathe.
Improves spine flexibility, opens chest and hips, strengthens back muscles, stimulates abdominal organs, & enhances posture.
1) Use blocks under palms. 2) Practice Half Pigeon for hip opening. 3) Camel Pose to build backbend strength and flexibility.
Back injury. Heart problems. High + low blood pressure.
Click here for lots of FREE downloadable Yoga lesson plans.
Click here for lots of FREE downloadable Pilates lesson plans.
Full Pigeon Pose (Kapotasana) Overview
Full Kapotasana, pronounced kah-po-TAHS-uh-nuh, is known as Full King Pigeon Pose (or Kneeling Backbend) in English. The name Kapotasana is derived from the Sanskrit words “kapota” meaning “pigeon” and “asana” meaning “pose” or “posture.”
This pose is characterized by a deep arch in the back where the hands reach back to touch the feet while the practitioner is on their knees. It requires significant flexibility in the spine, hips, and shoulders, as well as strength in the back and core muscles.
Kapotasana has lots of benefits, including opening the chest and shoulders, stretching the entire front of the body, strengthening the back and core, stimulating the nervous system, and promoting circulation to the organs.
Variations of the pose include Eka Pada Rajakapotasana (One-Legged King Pigeon Pose), which is often more accessible to beginners and focuses on stretching one leg at a time. There are also preparatory poses like Ustrasana (Camel Pose) and Setu Bandhasana (Bridge Pose) that help in developing the flexibility required for Kapotasana.
Due to the intensity of the posture, it is recommended to practice under the guidance of an experienced instructor, with ample warm-up and appropriate modifications to prevent injury.
Teaching Directions For Full Pigeon Pose (Kapotasana)
Begin kneeling, hands on hips, inhale and arch back, reaching hands toward feet.
Place palms on soles, fingers pointing towards toes, elbows pointing up.
Press hips forward, deepen backbend, and relax head back.
Breathe.
Yoga Lesson Plan: Cultivating Openness with Full Pigeon Pose
Class Level: Advanced
Duration: 90 minutes
Aims:
To guide students into Full Kapotasana (Kneeling Backbend Pose) safely and mindfully.
To develop the necessary flexibility in the spine, hips, and shoulders.
To cultivate an understanding of openness and vulnerability through deep backbends.
Objectives:
Students will perform asanas that systematically open the hip flexors, shoulders, and thoracic spine.
Students will demonstrate proper engagement and alignment in preparatory poses leading to Kapotasana.
Students will explore their personal edge and use modifications as needed, respecting their bodies’ limits.
Class Theme: “Embracing Vulnerability”
Encourage students to embrace the vulnerability that comes with deep backbends as a pathway to greater self-awareness and openness.
Class Structure:
Centring (5 minutes): Begin with a seated meditation focusing on heart opening, setting the intention for vulnerability and openness (see below for a script you can use).
“Find a comfortable seated position, spine tall, hands resting gently on your knees or in your lap. Close your eyes and take a deep breath in, filling your chest with air, and expanding your heart space. As you exhale, let go of any tension or tightness you feel within.
With each inhale, visualize a warm light at the centre of your chest, glowing brighter and expanding further. With each exhale, imagine this light radiating compassion, love, and openness from you.
As you continue to breathe, allow this light to soften any barriers around your heart, melting away any fear or resistance. Feel your heart centre becoming more receptive and more open to the experiences around you.
Inhale the qualities of kindness and empathy; exhale any remnants of hardness or coldness. Let your heart be open and vulnerable, yet strong and wise.
Spend a few more breaths in this space of openness and warmth. When you feel ready, bring your hands to meet at the heart centre in Anjali Mudra, sealing in the light and love you’ve cultivated.
Gently blink your eyes open, carrying this open-hearted energy with you throughout this class. Namaste.”
Seated & Floor Warm-Up (25 minutes): Gentle spinal twists, side bends, and gradual chest openers to warm up the torso.
Gentle Spinal Twists:
Half Lord Of The Fishes Pose (Ardha Matsyendrasana): Sit with legs extended. Cross your right foot over the outside of your left thigh. Bend your left knee, placing the left heel beside the right hip. Place your right hand behind you, and as you inhale, lift your left arm up. As you exhale, twist to the right, bringing your left elbow outside of your right knee. Hold for a few breaths, then release and repeat on the opposite side.
Supine Spinal Twist Pose (Supta Matsyendrasana): Lie on your back with your arms extended in a T-shape. Bring your knees into your chest and then gently lower them to the right, keeping your knees stacked. Turn your head to the left, if comfortable. Hold for several breaths, then bring the knees back to the centre and twist to the other side.
Side Bends:
Seated (Easy) Side Bend Pose: Sit in a comfortable cross-legged position. Place your right hand on the floor beside you, inhale and reach your left arm overhead, bending towards the right. Keep your left sit bone grounded as you open up the left side of your body. Hold for a few breaths, then repeat on the opposite side.
Supine Palm Tree Pose Side Bend Pose (Bananasana): Lie on your back and walk your feet to the right corner of your mat, and your arms and shoulders to the right corner, creating a banana shape with your body. Ensure your hips stay grounded. Hold for a few breaths, then switch to the left side.
Chest Opener:
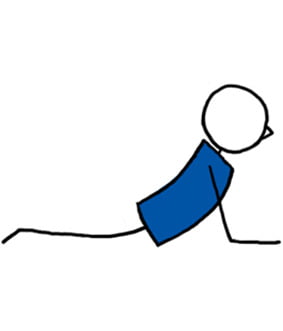
Cobra Pose (Bhujangasana): Lie on your stomach, place your hands under your shoulders, and hug your elbows back. Inhale and gently lift your chest off the floor, keeping a slight bend in the elbows. Draw your shoulders back and down, opening the chest forward. Hold for a few breaths, then release.
Sun Salutations (10 minutes): Flow through Sun Salutations to build heat and prepare the body for deeper poses.
Standing Sequence (10 minutes):
Warriors I Pose (Virabhadrasana I) for hip and chest opening.
Warrior II Pose (Virabhadrasana II) transitioning into Extended Side Angle Pose (Utthita Parsvakonasana) for lateral body stretching.
Hip Openers and Core Strengthening (10 minutes):
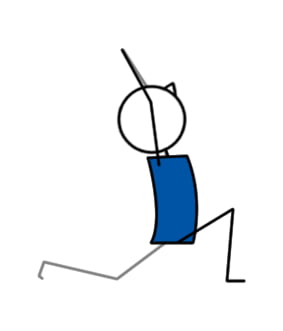
Low Lunge Pose (Anjaneyasana) with backbend to open hip flexors.
Boat Pose (Navasana) for core activation.
Backbending Sequence (15 minutes):
Camel Pose (Ustrasana) to initiate heart opening.
Bow Pose (Dhanurasana) for back muscle engagement and shoulder flexibility.
Bridge Pose (Setu Bandhasana) to prepare for deeper backbends.
Peak Pose – Full Kapotasana (15 minutes):
Slowly guide students into the pose, offering modifications (see below) and hands-on assists (see below). Encourage the use of props and partner assists.
Counterposes and Cool Down (10 minutes):
Child’s Pose (Balasana) to release the back.
Supine Butterfly Pose (Supta Baddha Konasana) for gentle hip opening.
Savasana (5 minutes):
Guide students into Savasana, allowing for complete relaxation and integration of the open-hearted practice.
Closing (5 minutes):
Revisit the theme in a seated position, inviting students to share any insights from their practice.
Close with a few moments of silent reflection, followed by a collective Om Mantra and Namaste.
20 Modifications For Full Pigeon Pose (Kapotasana)
Here are 20 modifications for Full Pigeon Pose (Kapotasana), which cater to various skill levels and physical limitations:
Modification 1: Supported Backbend
Place a bolster or a stack of blankets under your back as you lie down to mimic the arch of Kapotasana without the intensity.
Modification 2: Elevated Hands
Use yoga blocks under your palms to reduce the bend in the wrists and ease the stretch in the shoulders.
Modification 3: Chair-Assisted Kapotasana
Place a chair behind you and reach back to hold onto the seat, reducing the distance your hands need to travel.
Modification 4: Wall-Assisted Drop Back
Stand facing away from a wall, and reach your hands back to touch the wall as you arch backwards, using it to control the depth of your backbend.
Modification 5: Strap Around Arms
Use a strap to keep your arms shoulder-width apart, preventing elbows from splaying outward during the pose.
Modification 6: Camel Pose
Perform Camel Pose (Ustrasana) as a preliminary backbend to open the chest and quads before attempting Kapotasana.
Modification 7: Half Kapotasana
From a kneeling position, arch back and reach one hand toward one foot, keeping the other hand on the hip as a support.
Modification 8: Reclined Hero Pose
Lie back in Reclined Hero Pose (Supta Virasana) to stretch the thighs and hip flexors in preparation for the deeper backbend.
Modification 9: Bridge Pose Preparation
Practice Bridge Pose (Setu Bandhasana) with a block under the sacrum to gently prepare the spine for backbends.
Modification 10: Extended Puppy Pose
Enter Extended Puppy Pose (Uttana Shishosana) to open the chest and shoulders, a less intense alternative to full Kapotasana.
Modification 11: Forearm Support
Come onto your forearms instead of reaching all the way back to the feet, reducing the strain on your back.
Modification 12: Block Under Sacrum
Place a yoga block under the sacrum in Camel Pose to support the lower back while still engaging the core and back muscles.
Modification 13: Partner Assistance
Have a partner support your lower back as you drop back, guiding and stabilizing your descent.
Modification 14: Lying Knee-to-Chest Stretch
On your back, draw one knee at a time to the chest to release the lower back and mimic the hip flexion of Kapotasana.
Modification 15: Bolster Under Knees
Place a bolster under your knees in Camel Pose to decrease the tension in the quadriceps and hip flexors.
Modification 16: Reclined Bound Angle Pose
Use the Reclined Bound Angle Pose (Supta Baddha Konasana) to open the hips and groin gently before attempting the full pose.
Modification 17: Standing Arch
Perform a standing backbend, reaching arms overhead and arching back to engage the back muscles without the deep bend of Kapotasana.
Modification 18: Sphinx Pose
Perform Sphinx Pose (Bhujangasana). Lie on your stomach and prop yourself up on your forearms, lifting your chest to stretch the abdomen and stabilize the lower back.
Modification 19: Single Leg Backbend
While kneeling, extend one arm backwards to reach one foot at a time, focusing on opening one side of the body before switching.
Modification 20: Reclinded Hand-To-Big-Toe Pose
Practice the Reclined Hand-To-Big-Toe Pose (Supta Padangusthasana) while standing to stretch the shoulders and back, preparing for the hand-to-foot connection in Kapotasana.
If you’re not satisfied with only having 20 modifications, I thought you might like these 20 assists.
20 Teachers Assists For Full Pigeon Pose (Kapotasana)
Here are 20 teacher assists for Wheel Pose to help students achieve proper alignment, deepen the pose, and ensure safety:
Assist 1: Stabilizing the Base
Ensure the student’s knees and feet are properly aligned and hips are squared to provide a stable base for the pose.
Assist 2: Guided Entry
Support the student’s hips as they begin to bend backwards, helping them control the descent into the pose.
Assist 3: Shoulder Opening
Gently press down on the student’s shoulders to deepen the shoulder opening without straining the neck.
Assist 4: Back Support
Place one hand on the student’s lower back and the other between the shoulder blades to guide the backbend and prevent collapsing.
Assist 5: Hip Flexor Stretch
Apply gentle pressure to the front of the hip crease to encourage a deeper stretch in the hip flexors.
Assist 6: Thigh Engagement
Encourage the student to engage their thighs by providing resistance they can press their legs into.
Assist 7: Elbow Alignment
Adjust the student’s elbows to ensure they are not splaying out, maintaining shoulder integrity.
Assist 8: Hand-to-Foot Connection
Guide the student’s hands to their feet, ensuring a safe and comfortable grip for the full expression of the pose.
Assist 9: Quadriceps Release
Massage or apply gentle pressure to the quadriceps to help release muscle tension.
Assist 10: Chest Expansion
Encourage the student to lift through the chest by gently lifting the front of their rib cage.
Assist 11: Neck Support
Cradle the base of the student’s skull in your hands to support the neck and encourage relaxation in the cervical spine.
Assist 12: Pelvic Tilt
Help the student to slightly tuck the pelvis to protect the lower back and maintain alignment.
Assist 13: Ankle Alignment
Ensure the student’s ankles are in line with their knees to avoid undue stress on the joints.
Assist 14: Spinal Lengthening
Provide a gentle upward lift along the spine to encourage length rather than compression.
Assist 15: Sacrum Support
Place a hand on the sacrum and gently press down to ground the student and prevent over-arching.
Assist 16: Foot Pressure
Apply gentle pressure to the soles of the feet to help the student press down and lift the torso higher.
Assist 17: Breath Cueing
Remind the student to breathe deeply, using the breath to facilitate relaxation into the pose.
Assist 18: Side BodyLengthening
Gently stretch the student’s side body to encourage even distribution of the backbend.
Assist 19: Exit Guidance
Support the student as they carefully come out of the pose, ensuring a safe and controlled release.
Assist 20: Heart Space Opening
Place hands lightly on the chest area to guide the student’s focus on opening the heart space in the pose.


