


 Yoga Lesson Planner
 Pilates Lesson Planner
| Category: | Yoga Lesson Planner |
|---|---|
| Sub Category: | Standing |
| Types: | Balance, Object, Restorative, Standing, Strengthen |
| Anatomy: | Core, Hamstrings, Hips, Lower Back, Middle Back, Neck |
| Chakras: | Base, Sacral Centre |
| Therapy: | Anxiety, Back Pain, Poor Posture, Stress |
| Drishti: | Tip Of Nose |
| Dosha: | Kapha, Pitta |
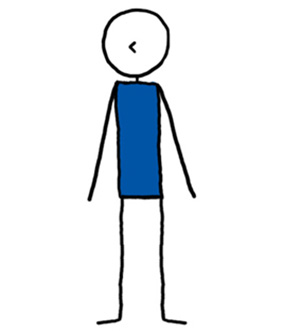
Stand (or sit) with your feet parallel to one another and about hip-width distance apart. Allow your arms to rest by your sides and let your breath soften. Press your heels into the mat. At the same time spread your toes out and down into the mat. Maintain a smooth, steady breath. To find an even weight distribution between all four corners of your feet, explore rocking forward into your toes and back into your heels; then from the outer edges to the inner edges. Do this until you find your balance or centre point. Start to bend your knees gently, then press your feet into your mat and re-straighten your legs while you lift the inner seam of your legs – from inner ankles all the way up to inner thighs. Tilt your pelvis so that the tailbone can drop slightly and the rest of the spine lengthens upwards. Engage the front of your thighs to create a lifting of your knees upwards, allowing the pelvic floor to engage. Feel the energy flow through the centre of the inner arches and rise up more with each inhale.
The foot lock recruits leg muscles to support your lower body allowing you to find stability from the ground up, which makes any posture more stable and safe.
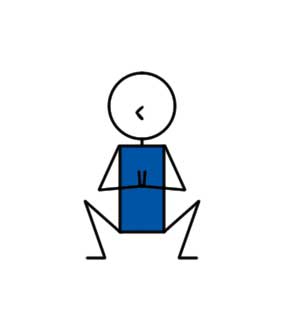
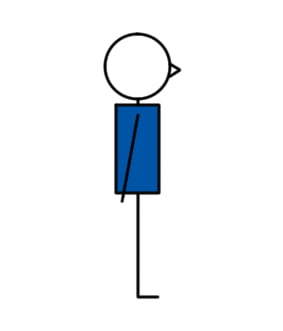
A) Palms together in prayer mudra behind the back. B) Hands raised over your head. C) Eyes closed. D) Samashthiti (feet together). E) Feet hip-distance apart. F) Rock gently back and forth and side to side. G) Block between the thighs. H) Palms together in front of the chest in prayer mudra. I) Interlace fingers and extend arms straight in front of you (shoulder stretch).
Avoid locking the knees out (allow your knees to soften).
Click here for lots of FREE downloadable Yoga lesson plans.
Click here for lots of FREE downloadable Pilates lesson plans.
Pada Bandha FAQs
How Do I Explain What Pada Bandha Is To My Students?
Pada bandha is when the soles of the feet are placed on the ground so the weight is evenly distributed in the triangle formed by the big toe, little toe and ankle. This bandha deeply connects your body with the earth through the feet.
The term comes from the Sanskrit pada, meaning “foot,” and bandha, meaning “lock,” “tighten” or “harness.”
Bandhas are locks because they lock life-force energy (prana) in the body. The prana flows through the body, energising and balancing the internal systems and organs.
What Are Some Teaching Tips For Mountain Pose?
When observing your students, press down on their shoulders if they look like they are holding tension (shoulders have a tendency to raise when the person is stressed).
When observing your students and you see that their chest is collapsed, ask them to peel their shoulders back and down. Also, ask them to visualise their shoulders as ice blocks, and feel the ice melting (to help soften their “hard” shoulders).
What Are Some Stock Phrases Teachers Use When Teaching Mountain Pose That I Can Use In My Classes?
“Lift up through the top of your head”.
“Notice where your body is tugging due to stress or stiffness.”
“Be aware of when your mind has gone wandering.”
“Be aware of how tight your mouth is. You’ll be surprised how tight it is.”
“Are you clenching your mouth?”
“Are you furrowing your brow?”
“Do you feel as solid and stable as a Mountain?”
“Lift and spread your toes and the balls of your feet, then lay them softly back down on the mat.”
“Rock gently back and forth and side to side.”
“Feel your energy swirl up from your feet up to your core.”
“Allow your shoulder blades to draw toward each other and down the back, away from the ears.”
“Let your arms relax beside your torso, palms facing in or forward.”
“Tongue wide and flat on the floor of your mouth.”
“Throat soft.”
“Soften your eyes.”
“Breathe.”
“Stand with your feet hip distance apart, or together.”
“Feel a deep connection with the ground.”
“Don’t lock your knees.”
“Inner thighs slightly turn in.”
“Draw your abdomen slightly in and up to engage Mula Bandha, the pelvic floor muscles, and Uddiyana Bandha, the abdominals up to the diaphragm.”
“Feel the top of your sternum lifting towards the ceiling.”
“Keep your ribs soft.”
“Firm your shoulder blades onto your back.”
“Lift the crown of your head up.”
“Soften your face, especially the eyes and the jaw.”
What Are Some Variations Of Mountain Pose That I Can Teach To My Students?
A) Hands in prayer (namaste) mudra behind the back.
B) Hands raised over your head.
C) Eyes closed (use Mountain Pose as an opportunity to pause between poses, feeling the effects in your body).
D) Samashthiti (feet together).
E) Feet hip-distance apart.
F) Rock gently back and forth and side to side.
G) Block between the thighs. Squeeze the block and roll it slightly backwards to feel the engagement and rotation of the thighs.
H) Palms together in front of the chest in Namaste mudra.
I) Interlace your fingers, and extend the arms straight in front of you (shoulder stretch).
J) Mountain pose against a wall
K) Mountain pose with arms up (parallel to the ground).
L) Mountain pose with hands behind your hand.
M) Mountain lock pose.
N) Mountain palm lock.
What Are The Benefits Of Mountain Pose?
Improves posture and concentration. Strengthens legs. Engages core. Strengthens your thighs, knees, and ankles. Firms your abdomen and buttocks. Relieves sciatica. Reduces flat feet.
Mountain Pose looks simple, but a lot is going on under the hood. Your muscles will be working surprisingly hard.
Mountain Pose also acts as the “starting point” for many other poses.
What Needs To Be Engaged In Mountain Pose?
Mountain pose is almost a meditation. It allows you to hone your “body awareness”. When you’re in Mountain pose become aware of which parts of your body are engaged, and which are soft.
Your core should be engaged.
Your face, mouth, cheeks, hands, wrists, shoulders and legs should have a feeling of softness.