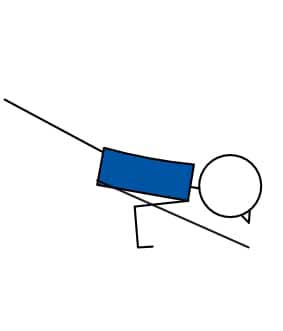
Sage Koundinya I
| Sanskrit Name: | Eka Pada Koundinyasana I |
|---|---|
| Similar Pose Names: | Koundinya,Hurdler,Flying Splits,Twisted One Legged Arm Balance,Twisted One Leg Arm Balance,Side Crow Variation |
| Category: | Seated & Floor |
| Share on: |
 Yoga Lesson Planner
 Pilates Lesson Planner
| Category: | Yoga Lesson Planner |
|---|---|
| Sub Category: | Seated & Floor |
| Types: | Animal, Arm Balance, Balance, Forward Bend, Hip Opener, Inversion, Prone, Seated & Floor, Strengthen |
| Anatomy: | Arms & Shoulders, Biceps & Triceps, Core, Hamstrings, Hips, Psoas, Wrists & Arms |
| Chakras: | Crown Centre, Heart Centre, Solar Plexus Centre, Throat Centre |
| Therapy: | Confidence Building |
| Drishti: | Tip Of Nose |
| Dosha: | Kapha, Pitta |
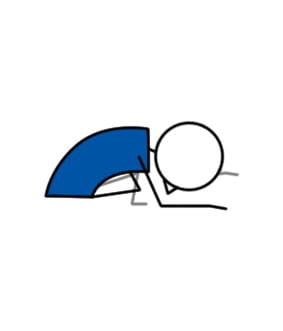
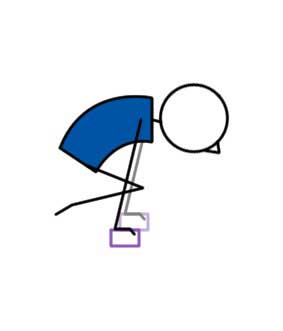
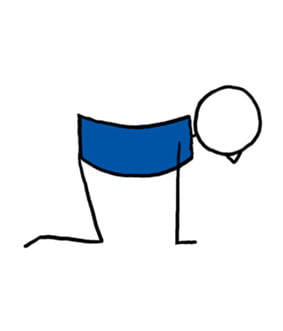
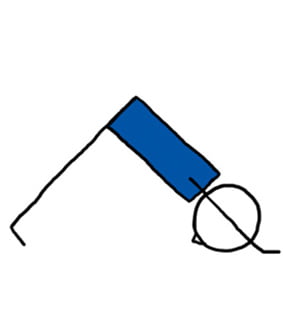
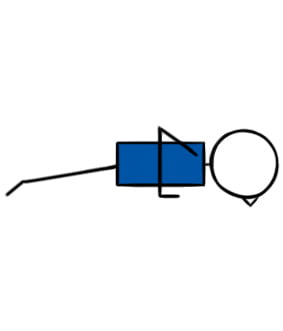
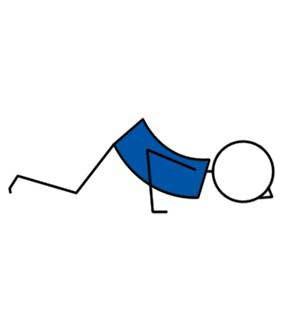
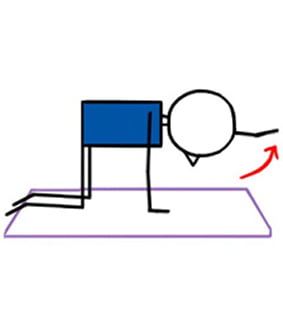
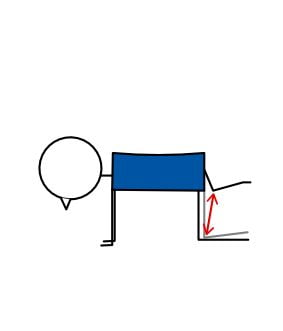
Begin in a low lunge with the right leg forward. Plant palms flat, shoulder-width apart. Twist to the right, hooking left knee over right elbow. Shift weight forward, lifting off the feet, extending the left leg back and right leg out, balancing on your hands. Breathe.
Strengthens arms and wrists, tones the abdomen, improves balance and focus, enhances coordination, and stretches the hamstrings and hips.
A) Use a block under the face for safety. B) Practice Twisted Lunge to build core strength. C) Place cushion where the head might land. D) Work on Four Limbed Staff Pose (Chaturanga) to build arm stability.
Avoid if you have wrist, elbow, or shoulder injuries. Be cautious with lower back or hamstring issues.
Click here for lots of FREE downloadable Yoga lesson plans.
Click here for lots of FREE downloadable Pilates lesson plans.
Sage Koundinya I (Eka Pada Koundinyasana I) Theme Ideas That You Can Use In Your Next Yoga Class
Yoga class themes add a bit of fun and creativity to a yoga class.
If you’ve chosen Sage Koundinya I as your peak pose, below are some ways to weave crow symbolism into the class theme.
Theme 1: Balancing Determination and Surrender
Discuss the balance between effort in the arms and the surrender of the legs, finding ease within the challenge of the pose.
Theme 2: The Wisdom of Sage Koundinya
Explore the story of Sage Koundinya’s dedication and insight, encouraging students to apply this wisdom to their practice and life challenges.
Theme 3: Twisting Out Toxins
Use the twisting nature of the pose to symbolize detoxifying the body and mind, releasing negativity and opening up to new perspectives.
Theme 4: The Art of Asymmetry
Celebrate the body’s asymmetrical balance and strength in this pose, paralleling life’s uneven paths where we find stability in instability.
Theme 5: Cultivating Focus and Precision
Highlight the need for sharp focus and precise alignment in Sage Koundinya I, drawing parallels to cultivating these skills in daily activities.
If you liked those themes, you’ll like these 20 modifications for Sage Koundinya I pose.
20 Modifications For Sage Koundinya I (Eka Pada Koundinyasana I)
Modification 1: Block Support Under Hand
Place a yoga block under the hand on the side you’re twisting towards for added lift and stability.
Modification 2: High Lunge Twist
Practice the twisting action in a high lunge without the arm balance to build core strength and prepare the body for the twist.
Modification 3: Back Knee Down
Perform the twist with the back knee on the ground to reduce intensity and focus on the upper body twist and arm strength.
Modification 4: Forearm Variation
Instead of palms on the ground, come onto the forearms to decrease the distance you have to lean forward, making the balance more accessible.
Modification 5: Strap Around Upper Arms
Use a strap around the upper arms to keep them from splaying outwards, maintaining proper shoulder alignment.
Modification 6: Wall Side Plank
Practice a twisted side plank with the back against the wall to understand the leg positions without the balance challenge.
Modification 7: Cushioned Landing
Place a bolster or cushion where your hip or head might land to build confidence as you lean into the arm balance.
Modification 8: Elevated Front Foot
Start with the front foot on a block to deepen the twist and reduce the distance to the arm balance.
Modification 9: Chair Under Hips
Position a chair under your hips to support them as you work on the upper body strength and twist required for the pose.
Modification 10: One Leg Extended
From the twisted position, extend only the back leg while keeping the front foot on the ground for less intensity.
Modification 11: Partial Arm Balance
Lift only the front foot off the floor, keeping the back leg grounded as you build strength and balance.
Modification 12: Toe Taps
From the arm balance, tap the toes on the ground alternately to practice weight shifting and build control.
Modification 13: Twisted Chair Pose
Strengthen the legs and core by holding a Twisted Chair pose, focusing on the twist and leg action without the arm balance.
Modification 14: Lizard Lunge Pose
Open the hips and groins with Lizard Lunge Pose to prepare the lower body for the intensity of Sage Koundinya I.
Modification 15: Twisted Down Dog
Perform a Twisted downward-facing dog pose to engage the same rotational elements in a more grounded posture.
Modification 16: Side Crow Progression
Work on Side Crow Pose which shares similar arm and core engagement with less demand on the hamstrings.
Modification 17: Supported Back Foot
Place the back foot against a wall for stability as you build the confidence to lift into the pose.
Modification 18: Pillow Under Face
Put a pillow in front of you to alleviate the fear of falling and to protect your face as you practice leaning forward.
Modification 19: Leg Supported by Partner
Have a partner hold the extended leg to help find the balance point and understand the energy of the pose.
Modification 20: Standing Twist Focus
Standing twists with arm engagement to replicate the upper body actions without the complexity of arm balancing.
If you liked those modifications, you’ll like these 20 teacher “assists” for Sage Koundinya I pose.
20 Teacher “Assists” For Sage Koundinya I (Eka Pada Koundinyasana I)
Assist 1: Foundational Hand Placement
Ensure the student’s hands are shoulder-width apart and fingers are spread wide for a strong base.
Assist 2: Hip Alignment
Help align the student’s hips to remain level as they twist and enter the pose.
Assist 3: Shoulder Stability
Guide the student’s shoulders away from the ears to maintain stability and space in the neck.
Assist 4: Engaging Core
Remind the student to engage the core muscles to support the lift into the pose.
Assist 5: Twisting Depth
Assist the student in deepening the twist to prepare for the leg positioning over the arm.
Assist 6: Guided Leg Extension
Support the lifted legs by placing a hand under the thighs, guiding the extension and lift.
Assist 7: Lowering Hesitation
Help students overcome the hesitation to lower their torso by supporting their backs as they lean forward.
Assist 8: Elbow Hook Security
Ensure that the student’s knee or thigh is securely hooked over the elbow to prevent slipping.
Assist 9: Floating Feet
Place a hand under the student’s feet to give them the feeling of the foot float required for the balance.
Assist 10: Balancing Assistance
Provide a light touch to the student’s balancing points to help them find their centre of gravity.
Assist 11: Safe Exit Strategy
Guide the student on how to safely exit the pose, ensuring they don’t fall out abruptly.
Assist 12: Elevated Hand Support
Place a block under the student’s hands to reduce the distance they have to lean for the arm balance.
Assist 13: Leg Direction
Help position the student’s extended legs correctly by lightly guiding them in the right direction.
Assist 14: Back Bend Encouragement
Encourage the student to engage in a slight backbend, which is integral to the pose.
Assist 15: Gentle Foot Nudge
Nudge the student’s feet gently towards the head to mimic the full expression of the pose.
Assist 16: Hip Lifting Cue
Use hands to gently encourage the student’s hips upward, countering the weight of the legs.
Assist 17: Chest Expansion
Help the student expand their chest and open their collarbones by drawing the shoulder blades together.
Assist 18: Weight Transfer
Assist the student in transferring their weight forward into their hands and arms.
Assist 19: Spotter
Stand close by as a spotter to provide confidence and safety as they practice the pose.
Assist 20: Alignment Check
Continually check and correct alignment throughout the pose to ensure safety and effectiveness.
While you’re giving the “assists”, it’s important to remind your students of the amazing benefits of balance poses.
Benefits Of Balance Poses
Balance is the ability to control your body’s position, whether stationary (i.e. a complex yoga pose) or while moving (e.g. playing golf).
Balance is a key component of Yoga, along with strength and flexibility poses.
Top 5 Benefits of Balance Poses:
Balance Benefit 1: Body Awareness
Body awareness is how your limbs are oriented in space, also known as proprioception. Balance training improves body awareness, which decreases the likelihood of injury.
Balance Benefit 2: Coordination
Balance poses require your entire body to work in harmony, otherwise, you will fall or stumble. Improved coordination during balance poses will be transferred into coordination in everyday life.
Balance Benefit 3: Joint Stability
Balance poses to promote stable knees, ankles, hips, and shoulders. This can prevent a multitude of injuries including sprained ankles and knee problems.
Balance Benefit 4: Reaction Time
Balance poses can improve your reaction time. If you happen to slip or stumble when performing balance poses, your body needs to re-balance immediately or you will fall. This in turn will improve your reaction time in everyday life.
Balance Benefit 5: Long-Term Health
Adding balance poses into your Yoga session helps to maintain or improve your balance, which is needed to prevent falls and fractures. As we age, our balance can deteriorate. Yoga balances will help delay that deterioration.


