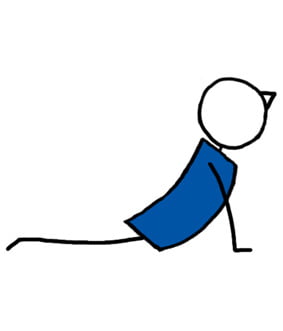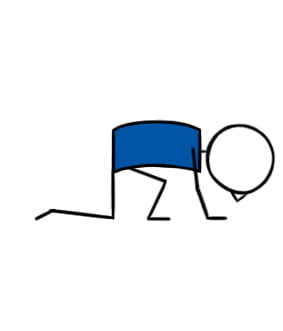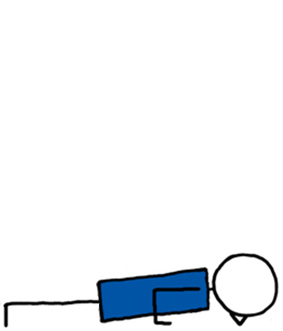
Low Plank
| Sanskrit Name: | Chaturanga Dandasana |
|---|---|
| Similar Pose Names: | Four Limbed Staff |
| Category: | Seated & Floor |
| Share on: |
|


 Yoga Lesson Planner
 Pilates Lesson Planner
| Category: | Yoga Lesson Planner |
|---|---|
| Sub Category: | Seated & Floor |
| Types: | Arm Balance, Balance, Object, Prone, Seated & Floor, Strengthen |
| Anatomy: | Arms & Shoulders, Biceps & Triceps, Core, Hamstrings, Psoas, Wrists & Arms |
| Chakras: | Base, Solar Plexus Centre |
| Therapy: | Confidence Building, Leg Congestion, Poor Posture, Varicose Veins |
| Drishti: | Tip Of Nose |
| Dosha: | Pitta |
Start in Plank Pose. Shift your weight forward. Lower your body, keeping it straight. Maintain a 90-degree angle at the elbows. Keep shoulders away from the ears. Hold for a few breaths. Lower down with control. Modify with knees on the mat if needed.
Strengthens arms, wrists, spine. Tones abs.
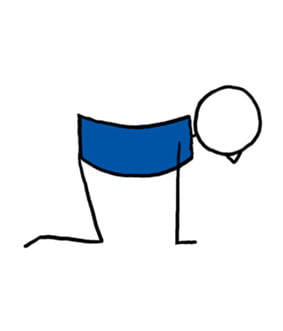
A) Knees on mat. B) Use wall to place feet for support. C) Dolphin Pose (forearms on mat).
Carpal tunnel syndrome
Click here for lots of FREE downloadable Yoga lesson plans.
Click here for lots of FREE downloadable Pilates lesson plans.
- Maja’s Flow + Sun A's
- Spine Awakening
- Chunk 2 - Moons
- Piyo
- Sun A Variation - Open Hips
- Nov 20
- SpunkyJoint-A
- Maja’s Flow + Sun A\'s 3
- Kneeled Flow
- Monday Move
- Sun 1/2 + A Malasana
- Ask Genie 1
- Modifikovaná Astanga na TT
- Glutes
- Core + Floor 2
- Maja’s Flow + Sun A's 2
- Kneeled Flow v2
- D July 2024
- Term 3 week 3 GSS
- Claire's Hatha cover class
- mikes yoga course exam program
- Sun Salutations A
- Sun Salutations B
- Dancing Warrior
- Sun Salutations A
- Gentle Flow WL 1.3
- Sun A Variation - Ladder
- 15 Minute Hip & Shoulder Opening
- Wine Yoga
- Circle Flow
- Mandalasana Vinyasa Flow
- Sun Salutations B Gratitude
- Sun AB - Every Time Flow
- Beginners and beyond 3
Mastering the Art of Teaching Chaturanga Dandasana (a.k.a Low Plank): A Comprehensive 16-Point Guide
Chaturanga Dandasana, often referred to as Low Plank or Four-Limbed Staff is a fundamental yoga asana that plays a crucial role in vinyasa and power yoga sequences.
This challenging pose not only builds upper body strength but also requires precise alignment to prevent injury. As a yoga instructor, providing the correct techniques and alignment principles for Chaturanga is essential to ensure your students practice safely and effectively.
In this guide, we will delve into the nuances of teaching Chaturanga Dandasana, offering valuable insights to help your students master this pose.
1. Begin with Proper Warm-up and Preparation
Before introducing Chaturanga, guide your students through a well-rounded warm-up to prepare their bodies. Emphasize the importance of wrist, shoulder, and core mobility exercises.
Sun Salutations (Surya Namaskar) are excellent for warming up and transitioning into Chaturanga seamlessly.
2. Alignment Tips
Explaining the alignment principles of Chaturanga Dandasana is crucial.
Start with these eight tips:
Tip 1: Wrists
In Plank Pose (Phalakasana), wrists should be directly under the shoulders, fingers spread wide.
Tip 2: Feet
Feet hip-width apart with toes tucked under.
Tip 3: Core
Engage core muscles and lengthen the spine.
Tip 4: Weight
Shift weight forward as you lower, keeping the body in a straight line.
Tip 5: Elbows
Elbows hug close to the ribs at a 90-degree angle.
Tip 7: Shoulders
Shoulder blades draw together and down the back.
Tip 8: Pelvis
Maintain a slight forward tilt in the pelvis.
3. Step-by-Step Demo
As an instructor, demonstrating Chaturanga is immensely beneficial. Perform the pose with clarity and precision, highlighting each step of the movement. Visual cues are powerful teaching tools that help students understand how to execute the pose correctly.
Below are the basic 7 steps for the pose
Start in Plank Pose.
Shift your weight forward.
Lower your body, keeping it straight.
Maintain a 90-degree angle at the elbows.
Keep shoulders away from the ears.
Hold for a few breaths.
Lower down with control.
4. Offer Variations & Modifications
Recognize that students have varying levels of strength and experience. Emphasize that modification is not a sign of weakness but a step towards building strength and awareness.
Encourage beginners to use these modifications:
Modification 1: Knees
Lower knees to the mat, keeping a straight line from head to knees.
Modification 2: Progress
Gradually progress from knees-down Chaturanga to the full expression.
Modification 3: Blocks
Use yoga blocks under the hands to alleviate wrist discomfort.
5. Breathing Awareness
Add breath awareness into Chaturanga instruction.
Inhale during the setup in Plank Pose and exhale as you lower into Chaturanga.
Encourage students to maintain a steady and controlled breath, emphasizing its role in linking movement and mindfulness.
6. Emphasize Engagement & Activation
Guide students to engage specific muscle groups during Chaturanga:
Tip 1: Core
Activate the core muscles to provide stability.
Tip 2: Thighs
Squeeze the inner thighs together.
Tip 3: Kneecaps
Lift the kneecaps and engage the quadriceps.
Tip 4: Tailbone
Draw the tailbone toward the heels.
Tip 5: Energy
Feel the energy through the fingertips and heels.
7. Prevent Common Mistakes
Address common mistakes that students often make in Chaturanga Dandasana:
Mistake 1: Slumped Shoulders
Slumping in the shoulders: Remind students to broaden and engage their shoulder blades.
Mistake 2: Collapsing Lower Back
Emphasize the importance of maintaining a slight forward pelvic tilt to protect the lumbar spine.
Mistake 3: Elbows Flared Outward
Reinforce the need to keep elbows close to the ribs to protect the shoulder joints.
Mistake 4: Head Pushed Forward
Encourage students to keep the neck in line with the spine by looking slightly forward.
8. Use Verbal Cues
Clear and concise verbal cues are essential when teaching Chaturanga.
Use phrases like:
“Engage your core.”
“Hug your elbows in.”
“Shoulders away from the ears.”
“Shift your weight forward.”
“Maintain a straight line.”
9. Hands-On Adjustments
Hands-on adjustments can be a valuable teaching tool but always ask for consent before touching a student. When giving adjustments, be gentle and respectful of their comfort levels.
10. Practice Safe Progression
Encourage students to progress safely. Advise them not to rush into a full Chaturanga if they’re not ready. Advancement in yoga poses takes time and patience.
11. Use Visualization Techniques
Guide students through visualization techniques that help them understand the alignment better.
Visualisation 1: Plank
Imagine your body is a straight plank, parallel to the ground, from your head to your heels as you lower down.
Visualisation 2: Hovering Tabletop
Visualize your body as a tabletop hovering just above the ground, maintaining a straight line.
Visualisation 3: Elbows Tucked Like Chickens
Envision your elbows hugging your ribcage like two wings of a chicken as you lower.
Visualisation 4: Press the Earth Away
Picture your palms pushing the earth away from you, creating space between your shoulders and the floor.
Visualisation 5: Floating Like a Feather
Think of your body as light as a feather, gently descending to the ground while maintaining control.
Visualisation 6: Drawbridge Lowering
Imagine your body lowering like a drawbridge, controlled and deliberate, with your core as the anchor.
Visualisation 7: Elevator Descent
Visualize your body as an elevator descending smoothly, maintaining a level position as it moves downward.
Visualisation 8: Engage Your Powerhouse
Picture your core as a strong powerhouse, lifting and supporting your body as you lower.
Visualisation 9: Flying Low
Think of yourself as a bird flying just above the ground, maintaining a level flight path.
Visualisation 10: Balancing on a Tightrope
Imagine balancing on a narrow tightrope as you lower, requiring steady alignment.
Visualisation 11: The Hydraulic Press
Visualize your body moving downward like a hydraulic press, evenly and with control.
Visualisation 12: Building Blocks
Picture your body as a stack of building blocks, each segment aligning precisely as you lower.
Visualisation 13: Body Bridge
Envision your body forming a bridge, with your heels, hips, and shoulders as the supporting pillars.
Visualisation 14: Resistance Band
Imagine a resistance band pulling your hips up slightly, preventing them from sagging as you lower.
Visualisation 15: Parallel Lines
Visualize your arms and torso forming two parallel lines as you hover above the ground.
Visualisation 16: Yoga Sling
Think of your arms and body as a yoga sling, gently cradling you as you lower down.
Visualisation 17: Fluid Movement
Envision your body moving like a fluid, with every part aligned and in harmony.
Visualisation 18: Flying Superman
Picture yourself as Superman flying just above the ground, maintaining a strong, straight line in your body.
12. Encourage Self-Awareness
Yoga is about self-discovery and self-awareness. Encourage your students to listen to their bodies, respect their limitations, and avoid pushing themselves too hard.
13. Build Strength Gradually
Remind your students that building strength takes time. Consistent practice will yield improvements in their Chaturanga over time. Encourage them to celebrate their progress, no matter how small.
14. Offer Post-Chaturanga Poses
After Chaturanga, guide your students into a suitable counterpose, such as:
Upward-Facing Dog Pose (Urdhva Mukha Svanasana)
Cobra Pose (Bhujangasana).
These poses help open the chest and release tension in the shoulders and wrists.
15. End with a Cool Down
Wrapping up a Chaturanga instruction with gentle stretches for the wrists, shoulders, and chest can help students release tension and avoid strain after this challenging pose.
Encourage your students to hold each stretch for several breaths and to focus on deep, mindful breathing to enhance the benefits of these wrap-up poses. These stretches will help them release tension, improve flexibility, and promote relaxation after practising Chaturanga Dandasana.
Here are 10 Wrap-up Poses:
Wrap-up Pose 1: Child’s Pose (Balasana)
Have students transition into Child’s Pose to release tension in the lower back and stretch the arms forward, gently stretching the shoulders and wrists.
Wrap-up Pose 2: Puppy Pose (Uttana Shishosana)
From Child’s Pose, encourage students to walk their hands forward, lowering their chest towards the ground while keeping the hips elevated. This pose provides a deep stretch for the shoulders and upper back.
Wrap-up Pose 3: Thread the Needle Pose
From Tabletop position, guide students to thread one arm under the opposite arm, lowering the shoulder and ear to the ground. This pose stretches the shoulders and upper back and can be done on both sides.
Wrap-up Pose 4: Sphinx Pose
Transition into Sphinx Pose, with the forearms on the mat, elbows under the shoulders, and chest lifted. This gentle backbend opens the chest and stretches the shoulders.
Wrap-up Pose 5: Puppy Pose Variation
From Sphinx Pose, have students lower their chest down towards the ground while keeping their hips grounded. This variation provides a deeper stretch for the chest and shoulders.
Wrap-up Pose 6: Cobra Pose (Bhujangasana)
Instruct students to transition into Cobra Pose, gently lifting their chest off the ground with their hands under their shoulders. This pose further stretches the chest and shoulders while strengthening the back.
Wrap-up Pose 7: Thread the Needle with Twist
Return to Tabletop position and guide students to thread one arm under the opposite arm, as in Thread the Needle Pose. Then, encourage them to reach the top arm toward the ceiling, adding a gentle twist to the spine and deeper shoulder stretch.
Wrap-up Pose 8: Melting Heart Pose (Anahatasana)
From Tabletop, have students walk their hands forward while keeping their hips elevated, lowering their chest towards the mat. This pose is an excellent chest opener and provides a soothing stretch for the shoulders.
Wrap-up Pose 9: Eagle Arms
Instruct students to sit cross-legged and bring their arms in front of them. Cross one arm under the other, bend the elbows, and bring the palms together if possible. Lift the elbows to shoulder height to stretch the shoulders and upper back. Repeat with the opposite arm on top.
Wrap-up Pose 10: Seated Heart Opener
Have students sit with their legs extended and place their hands behind them, fingertips pointing away from the body. Encourage them to lift their chest, open their heart, and gently press their shoulders back for a chest and shoulder stretch.
16. Personalize Feedback
Provide personalized feedback to your students during and after class. Offer specific tips for improvement and acknowledge their progress.
Conclusion
Teaching Chaturanga Dandasana effectively requires a combination of clear instructions, thoughtful cues, and a deep understanding of alignment principles.
By following this guide and tailoring your teaching approach to the needs of your students, you can empower them to master this foundational yoga pose safely and with confidence.