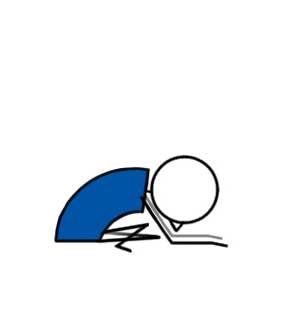
Easy Forward Fold II (Sukhasana) FAQs
[br]
What are the teaching steps?
From sitting stack right knee on top of left. Feet in the same place on either side. Balance on the centre of your sitting bones, positioning the pelvis so that the sacrum (the triangular bone just below the lumbar vertebrae) moves in and the abdomen lifts in and up. Fold forward by reaching arms in front of and resting head near knees. Keep rooting sitting bones into the earth as hips soften into the body. Switch sides.
What are the benefits of the pose?
Practice Easy Forward Fold pose to improve hip flexibility and get into the low back. Stretches the ankles and knees. Hip opener. Creates the inner environment for a relaxed yet alert state. To balance your shoulders over your hips, and align your head on top of your spine takes a good amount of core strength, so your abdominals will be getting a nice workout.
Is it a gentle pose?
Yes. This is a gentle pose that is usually practised at the beginning or end of a yoga practice. Even though the name is "Easy" there's plenty enough physical work going on in the pose.
What is the pose also known as?
Easy forward fold is also known as:
- Decent pose forward fold
- Easy forward fold
- Pleasant forward fold
- Sukhasana forward fold
What are the precautions?
Avoid if you have any leg, knee, or lower spine pain. Avoid if you have sciatica.
What are some modifications?
Folded Blankets: Elevating your pelvis by sitting on folded blankets will allow you to slowly release and open the hips while you lift and lengthen your spine.
Blocks: Stretch your arms forward and place them on two yoga blocks.
Palms Together: Press the palms together at the centre of your chest, before walking your hands forward and descending into the pose.
1/4: Fold a 1/4 of the way down.
1/2: Fold 1/2 of the way down.
3/4: Fold 3/4 of the way down.
4/4: Fold all the way down (forehead touches the mat).
Up Then Down: Interlace your fingers, extend your arms overhead, stretch up and fold forward.
Pelvis Floor: To sit more firmly on your sitting bones, reach underneath your buttocks and slide the flesh away from the bone. This broadens the pelvic floor which gives room for your inner thighs to release downward.
Socks: If the knees feel uncomfortable, roll up your socks and place them behind the backs of your knees before crossing your shins.
Shins: Support your outer shins with folded blankets.
What common mistakes do most students make when sitting cross-legged (Easy pose)?
One of the aims of sitting cross-legged in Easy Pose is to lengthen the spine as much as possible. To do that you need to be in balance.
Common Mistake 1: Sinking back through the hips and low back.
Common Mistake 2: Tipping your pelvis to the front with your belly falling forward.
Common Mistake 3: Legs aren't crossed at the centre of the shins (the cross should be in line with your pubic bone, navel, and sternum).
Common Mistake 4: Tension in the face (sitting cross-legged is meant to be a meditative posture, so be aware of any tension that creeps into the muscles around your eyes, jaw, mouth and tongue).


